

Showing posts with label green. Show all posts
Showing posts with label green. Show all posts
Saturday, July 25, 2015


Wednesday, July 22, 2015
Colored salt
I had a picture in a post long ago how the salt used to make patterns in the dye holds on to the color, giving me colored salt. Rather than throwing it away every time I reuse it, keeping the colors in separate bowls. I wanted to see if I could have the color on the salt go back on to a scarf.
First is a pic of the dry salt in a bowl and some of it sprinkled on a scarf


But now I can't do it again until I do more 'regular' salted ones since I don't have precolored salt. Hmmm, I wonder how colorful cake sugar sprinkles would work.... But those are such small bits.
First is a pic of the dry salt in a bowl and some of it sprinkled on a scarf

After sprinkling the rest of the salt on the scarf I misted it thoroughly to rinse the dye onto the scarf. Here you can see the color did migrate onto the scarf. The salt didn't have much color left on it.

And here are two finished scarves after being steamed and ironed. Very pretty, I think. The one on the left I used both blue and purple salt so the colors are mixed.

Tuesday, July 21, 2015
More dye powder oddness.
Similar to a previous post, this dye powder doesn't look much like the final color. Forest Green this time. The blue powder in it will normally be the last to dissolve. And the last picture a finished product.


Monday, December 16, 2013
Well, that isn't what I expected
Some days things just don't turn out the way you expect. Both shirts were dyed in chocolate brown dye. The pirate one is what I would expect. The ninja one is a nice olive green. The dye was from the same container. I thought maybe the mixed up dye solution had sat too long, but I had a problem with the fuchsia not taking in batch of black and purple at the same time. The black was a greenish gray and the purple was blue. All looked good, but weren't what I was trying for.
The best guess I have is that it is related to the water softener and how long between recharging and dyeing. We moved in April and there is hard water here. The softener recharges based on the date rather than volume of water used. But I'd dyed since we moved and it turned out so I didn't think much of it.
I think the next time I'm going to do a batch of shirts I'm going to have to either manually recharge the softener or order some add in softener.

The best guess I have is that it is related to the water softener and how long between recharging and dyeing. We moved in April and there is hard water here. The softener recharges based on the date rather than volume of water used. But I'd dyed since we moved and it turned out so I didn't think much of it.
I think the next time I'm going to do a batch of shirts I'm going to have to either manually recharge the softener or order some add in softener.

Sunday, August 25, 2013
Fire truck
This is a stencil I designed a couple months ago. It is in the style of fire trucks from the 40s-50s. The advantage of using stencils is that I can get sharper lines than if I was applying the was freehand. The stencil both masks the areas so I don't put was on them, but also seems to help keep it from wicking into the fabric as much. Also, it makes a design more repeatable. I cut this stencil at 3 different sizes so it would scale to a toddler's shirt as well as an adult's.
In looking up pictures of fire helmets I learned that firefighters have the nickname Leatherhead since the helmets were traditionally made of leather. The leather is being replaced with polymers and other plastics. The back brim is wider so it helps the water run down the back rather than inside the collar.


In looking up pictures of fire helmets I learned that firefighters have the nickname Leatherhead since the helmets were traditionally made of leather. The leather is being replaced with polymers and other plastics. The back brim is wider so it helps the water run down the back rather than inside the collar.


Thursday, August 22, 2013
Green
Another example of the different color on silk and cotton. As well as in different batches.
The silk scarf on the right was in the same container, at the same time, as the flower shirt in the middle. Although fiber reactive dye will work on silk, the colors shift a bit so it will be different. The tiger on the left was dyed with the same color, forest green from Dharma Trading, but in a different batch. It shows that there are differences from batch to batch.
There are several possibilities: I may have mixed it with hotter or cooler water, it may have been a different strength, the water hardness at the new house might have made a difference, the moon wasn't full.

The silk scarf on the right was in the same container, at the same time, as the flower shirt in the middle. Although fiber reactive dye will work on silk, the colors shift a bit so it will be different. The tiger on the left was dyed with the same color, forest green from Dharma Trading, but in a different batch. It shows that there are differences from batch to batch.
There are several possibilities: I may have mixed it with hotter or cooler water, it may have been a different strength, the water hardness at the new house might have made a difference, the moon wasn't full.

Friday, November 30, 2012
Garden
Well, this time of year we don't have too many butterflies, that is in flower or green. But we can always think about it. Just watch out for those bees.


Sunday, October 21, 2012

Thursday, October 4, 2012
Frozen or ice dyed
It isn't a technique I invented, but I modified one I saw mentioned elsewhere. Someone had described snow dyeing where you scrunch up your soda ash soaked item, put a layer of snow on it, pour on the dye and wait for the snow to melt and the dye to color the fabric. The dye doesn't react with the fiber until it gets warm enough. And when it is all scrunched up the insides of the shirt don't get dye as fast as the outsides. So by the time the snow has all melted there isn't any dye left to color the inside. Except this doesn't work as well in the summer or if I don't feel like digging snow up out in my yard.
· Soak the item in soda ash for at least 10 minutes to make sure it is completely wet. It can be a day or more if that works better.
· Prepare a flat work surface. I use a plastic tray to protect my work table and contain any drips. (See here for info)
· Squeeze out the excess water. You don’t need to really wring it out, but you don’t want it sopping wet. The more water left in it, the less dye that will get to the backside. Not a problem when doing fabric or a scarf since that is a single layer. But a t-shirt is 2 layers and the other side won’t have as much color. So it depends on the look you’re going for.
· Lay it out flat on your work surface then bunch it up. Try not to get parts folded under when bunching it up. You want to create high and low spots but not more layers. How tightly packed it is will affect how much dye gets into the fabric and to the back since the dye is applied to the tops of the ‘hills’ and won’t run down to the ‘valleys’ easily if it is tightly packed.

· I normally put the shirt into a one gallon bucket to keep it compact and to make it easy to handle. But for larger shirts I’ve used a plastic tray or plastic sheeting in a cardboard box. A larger plastic tray can hold more than one shirt or scarf at a time. 5 quart ice cream buckets would work well and have the added bonus of 'requiring' someone to eat the ice cream.


· Put the items in the freezer. If they’re only in there an hour or two they’ll have a different end pattern than if they’re in there for at least a day and are frozen solid. Since I’m in Minnesota I could put them out in the garage come January. See here for a comparison
· For the dye, I mix it fairly strong since I want it to be a good contrast to the white of the fabric. Again, it depends on how you want it to look. I use two or three colors. They may intermix so choose colors that will blend nicely. I mix at one tablespoon dye powder to one quart water and can cover 4-6 shirts with this amount. Make sure to wear your dust mask and gloves when working with dye powder. Wet some newspaper and lay it on the table before mixing the powder. It will help capture powder and make it easily visible and cleanable. I don’t add urea or anything else. Only dye powder and warm water. If you want more info and hints on how to mix up the dye powder, Dharma Trading has good detail.
· You can put the dye liquid into squirt bottles or measuring cups with spouts. Once you’ve used a cup or spoon for dye don't use it for food again. Use some cheapo or disposable cups and spoons. Check out Goodwill or the dollar store.
· Apply the colors in patches. You’ll have to experiment to see what you like best. I tend to cover the surface with dye. Usually, I use 2 colors in about equal amounts then add a third color in a smaller amount.


· Let sit for at least one day for it to thaw and react completely. The dye won’t react with the fabric until it gets up to room temp. If the area you’re storing the container in is colder, you’ll want to leave it for a couple days. It won’t hurt it any to leave it for several days until you’re ready to wash it out. The top might dry out a bit, but it won't hurt it if it does. And after a couple days it doesn’t really matter since all the dye that was going to react already has.
· Rinse well in cold water then wash by itself in warm or hot until the water is clear. Once the extra dye is thoroughly washed out it can be washed normally.
So instead of snow I freeze the shirts in my basement freezer. I've written up a step by step description of how I do it. Since I use the standup freezer in my basement I have quite a bit of room and can do several shirts at a time.
Some dye is highly likely to land on the table and/or floor so chose your location carefully. I work in the basement on a concrete floor near a floor drain. My basement isn’t really finished so it doesn’t matter to me. Plastic on the floor can be slippery so use with caution.
The instructions are for fiber reactive dye such as Procion MX. This isn’t for RIT or other all purpose dye.
· Dissolve soda ash in a bucket at one cup soda ash per gallon of water. Make sure to wear your dust mask when measuring out the soda ash. While it is pretty mild, it can’t be good to inhale the powder. The bucket needs to be large enough to fully submerse the shirt. If you’re doing more than one at a time they don’t need to all be in there at the same time but it makes it easier.
· Soak the item in soda ash for at least 10 minutes to make sure it is completely wet. It can be a day or more if that works better.
· Prepare a flat work surface. I use a plastic tray to protect my work table and contain any drips. (See here for info)
· Squeeze out the excess water. You don’t need to really wring it out, but you don’t want it sopping wet. The more water left in it, the less dye that will get to the backside. Not a problem when doing fabric or a scarf since that is a single layer. But a t-shirt is 2 layers and the other side won’t have as much color. So it depends on the look you’re going for.
· Lay it out flat on your work surface then bunch it up. Try not to get parts folded under when bunching it up. You want to create high and low spots but not more layers. How tightly packed it is will affect how much dye gets into the fabric and to the back since the dye is applied to the tops of the ‘hills’ and won’t run down to the ‘valleys’ easily if it is tightly packed.

· I normally put the shirt into a one gallon bucket to keep it compact and to make it easy to handle. But for larger shirts I’ve used a plastic tray or plastic sheeting in a cardboard box. A larger plastic tray can hold more than one shirt or scarf at a time. 5 quart ice cream buckets would work well and have the added bonus of 'requiring' someone to eat the ice cream.


· For the dye, I mix it fairly strong since I want it to be a good contrast to the white of the fabric. Again, it depends on how you want it to look. I use two or three colors. They may intermix so choose colors that will blend nicely. I mix at one tablespoon dye powder to one quart water and can cover 4-6 shirts with this amount. Make sure to wear your dust mask and gloves when working with dye powder. Wet some newspaper and lay it on the table before mixing the powder. It will help capture powder and make it easily visible and cleanable. I don’t add urea or anything else. Only dye powder and warm water. If you want more info and hints on how to mix up the dye powder, Dharma Trading has good detail.
· You can put the dye liquid into squirt bottles or measuring cups with spouts. Once you’ve used a cup or spoon for dye don't use it for food again. Use some cheapo or disposable cups and spoons. Check out Goodwill or the dollar store.
· Apply the colors in patches. You’ll have to experiment to see what you like best. I tend to cover the surface with dye. Usually, I use 2 colors in about equal amounts then add a third color in a smaller amount.


· Rinse well in cold water then wash by itself in warm or hot until the water is clear. Once the extra dye is thoroughly washed out it can be washed normally.
· Enjoy.


Friday, November 25, 2011
On safari
And a turtle on their rear end because I can. At this age they think it is fun that people notice their backside. As long as they are getting happy attention.


Thursday, November 17, 2011
Arrr
I should have posted this Monday, September 19th, since that is Talk Like a Pirate Day. But sometimes I just don't quite get there. Not that you have that problem, right?
And it goes well with yesterday's post with the male priates. Because women can be pirates also.

And it goes well with yesterday's post with the male priates. Because women can be pirates also.

Tuesday, November 15, 2011
Fishing
 When you go fishing you just know those large fish are down there. Just taunting you from the deep. But all you catch are the little ones. So long as it is a nice day out and you don't get lost, right?
Thursday, October 13, 2011
Bands
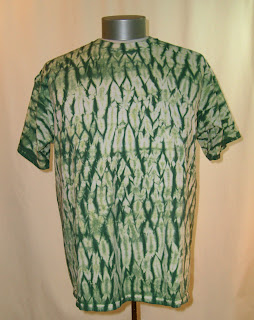
Bands only or all over? The contrast between the solid and pattern can make the pattern stand out more while the all over pattern can have a big impact. An example of Mokume Shibori, but only part of the shirt was stitched up for one.



Tuesday, December 7, 2010
Dreams

This makes we want to sing a modified Christmas song I'm dreaming of a psychedelic Christmas.
Thursday, October 21, 2010
Metals

Don't worry, I don't plan to wear these all together. But they have a common color.
All three silk scarves were braided together and dyed bronze. Then re-braided separately and dyed orange, green and maroon/purple. I really like the way the colors separate and combine. By having them braided the dye can't get to all parts of the scarf. But like the test strip samples, the dye doesn't absorb all at the same rate as it soaks into the fabric.
Subscribe to:
Posts (Atom)