Showing posts with label dye. Show all posts

Monday, July 27, 2015

Colors and colors

I was thinking of titling this, what a mess.  But considering how much I have stuffed into a small place it isn't bad.  This is just (most of) my dye.  I won't show you where I stash my stencils and other items.  And that shelf over there and....

For one of the art fairs I applied to they wanted a picture of your work area.  I assume it was to make sure you actually made the art yourself rather then buying and reselling.  Everything I offer started out plain white and I turned it colors.


Monday, December 16, 2013

Well, that isn't what I expected

Some days things just don't turn out the way you expect.  Both shirts were dyed in chocolate brown dye.  The pirate one is what I would expect.  The ninja one is a nice olive green.  The dye was from the same container.  I thought maybe the mixed up dye solution had sat too long, but I had a problem with the fuchsia not taking in batch of black and purple at the same time.  The black was a greenish gray and the purple was blue.  All looked good, but weren't what I was trying for.

The best guess I have is that it is related to the water softener and how long between recharging and dyeing.  We moved in April and there is hard water here.  The softener recharges based on the date rather than volume of water used.  But I'd dyed since we moved and it turned out so I didn't think much of it.

I think the next time I'm going to do a batch of shirts I'm going to have to either manually recharge the softener or order some add in softener.


Thursday, December 6, 2012

Lines

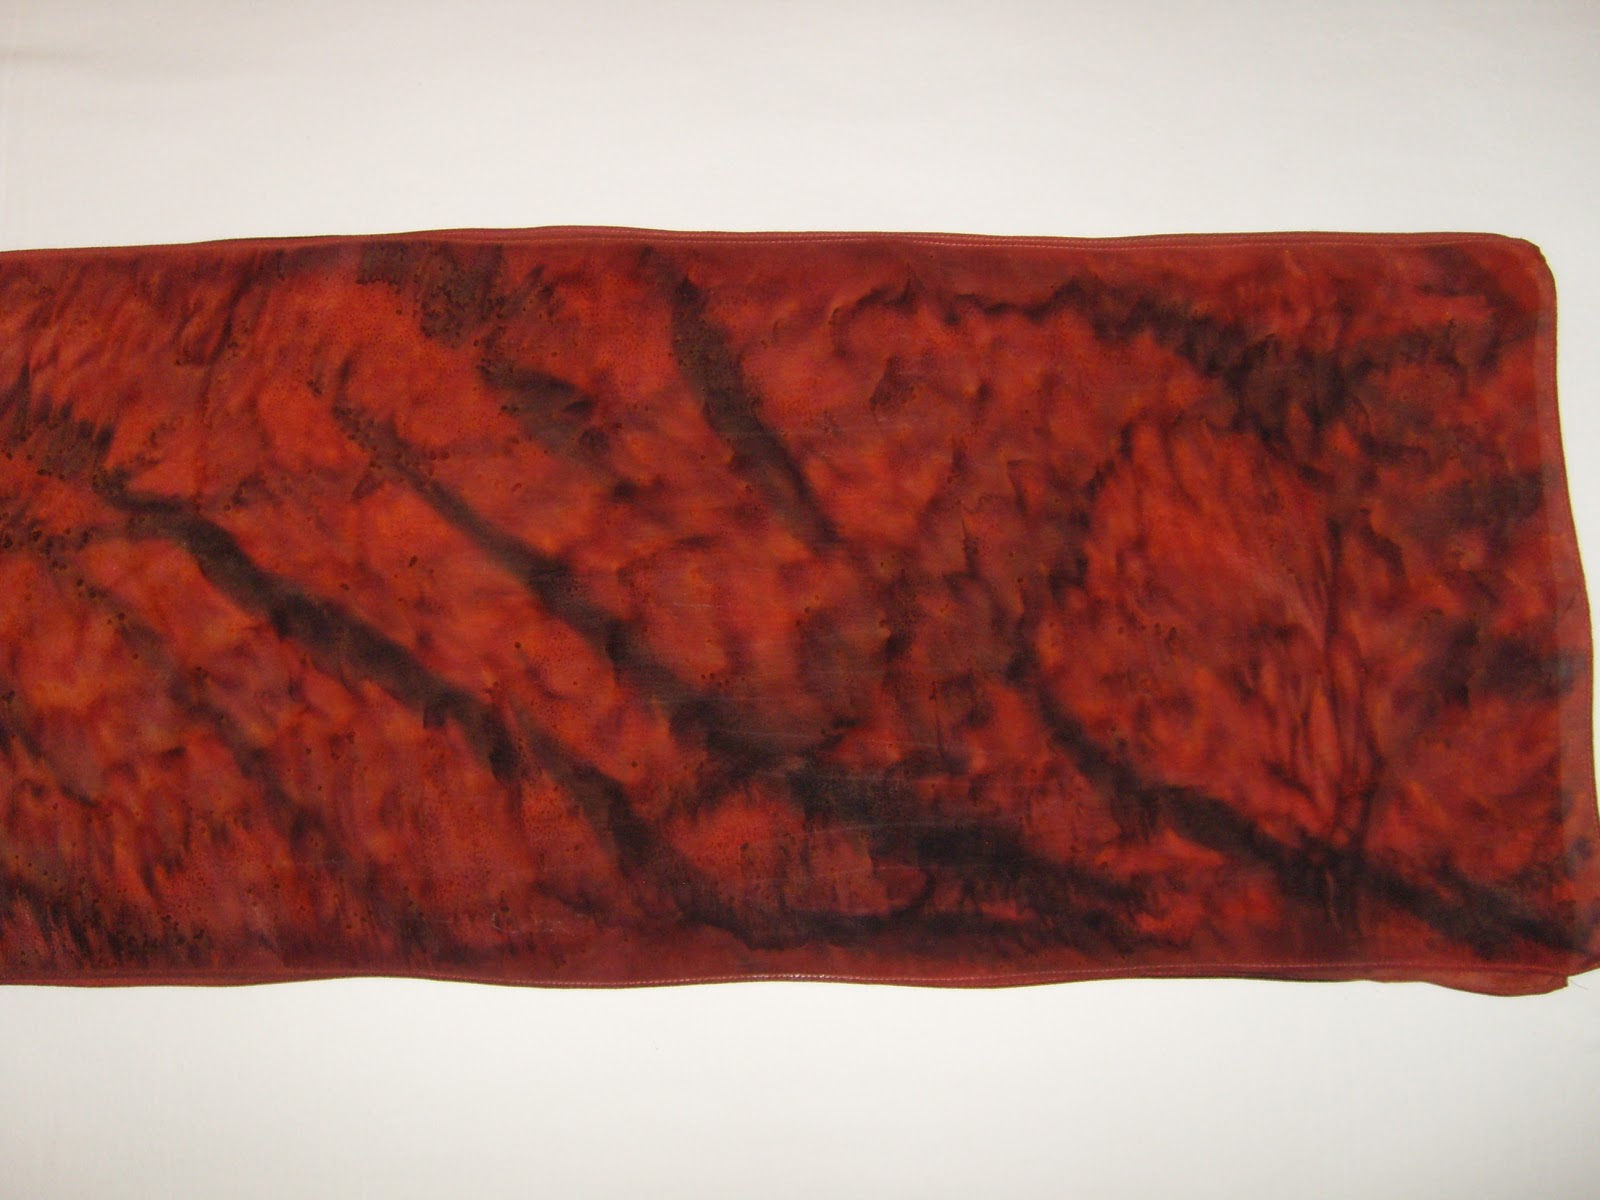
These pictures are all of the same silk scarf, but at different steps. 

First, I stretched it on the frame and painted it with red dye.  Then I painted some free form lines with black.  You can see in the first picture how defined the lines are. 


The second picture shows how diffuse the lines became with the salt pulling the dye.


And the scarf after steam setting the dye and washing it.  I'm really happy how this turned out.  Red dye doesn't move much with the salt, but the black does.

Thursday, November 29, 2012

Bright

I joke that this pink is bright so you won't lose your child in a crowd.  And the pattern done in batik is good for when you're taking a little girl to the zoo.  I figured I shouldn't put the lion on the front with one of the other animals.  It would be safer to have it on the back. 

Very girly.

Thursday, October 25, 2012

Because I can

Why would I go to the trouble of hand dyeing dish towels?  Because I can.  Now I have dish towels that match my kitchen.  They were just some plain 100% cotton ones. 

 
I'm really fond of my salt pig or salt cellar (in the middle).  I do a lot of baking and cooking and it is a lot easier to measure out salt fro mthis than trying to pour from a shaker into a spoon.  Unfortunately, the seller doesn't have any more listed in their Etsy shop right now.  My Mom said it looked "so weird", which it does.  But it's fun.  Should I mention that I suggested to my husband that I could make it into a small water fountain or Halloween decoration?  But that might be too weird.

And the little bowl I have under my pepper grinder helps keep my counters and table clean.  No more pepper bits everywhere you set it down.  Those are all of my hints for Heloise for now.

Saturday, October 6, 2012

Lavender

Another example of the different color cotton and silk give even when they're in the same container.  This is lavender dye.  The tshirt is a soft 100% cotton and the scarf is 100% silk Crepe de Chine.  The silk seems a lot more blue.  Other times when I put silk in blue dye it seems more purple.

Thursday, October 4, 2012

Frozen or ice dyed

It isn't a technique I invented, but I modified one I saw mentioned elsewhere.  Someone had described snow dyeing where you scrunch up your soda ash soaked item, put a layer of snow on it, pour on the dye and wait for the snow to melt and the dye to color the fabric.  The dye doesn't react with the fiber until it gets warm enough.  And when it is all scrunched up the insides of the shirt don't get dye as fast as the outsides.  So by the time the snow has all melted there isn't any dye left to color the inside.  Except this doesn't work as well in the summer or if I don't feel like digging snow up out in my yard.

So instead of snow I freeze the shirts in my basement freezer.  I've written up a step by step description of how I do it. Since I use the standup freezer in my basement I have quite a bit of room and can do several shirts at a time.

Some dye is highly likely to land on the table and/or floor so chose your location carefully. I work in the basement on a concrete floor near a floor drain. My basement isn’t really finished so it doesn’t matter to me. Plastic on the floor can be slippery so use with caution.

The instructions are for fiber reactive dye such as Procion MX. This isn’t for RIT or other all purpose dye.

 · Dissolve soda ash in a bucket at one cup soda ash per gallon of water. Make sure to wear your dust mask when measuring out the soda ash. While it is pretty mild, it can’t be good to inhale the powder. The bucket needs to be large enough to fully submerse the shirt. If you’re doing more than one at a time they don’t need to all be in there at the same time but it makes it easier.

· Soak the item in soda ash for at least 10 minutes to make sure it is completely wet. It can be a day or more if that works better.

· Prepare a flat work surface. I use a plastic tray to protect my work table and contain any drips. (See here for info)

· Squeeze out the excess water. You don’t need to really wring it out, but you don’t want it sopping wet. The more water left in it, the less dye that will get to the backside. Not a problem when doing fabric or a scarf since that is a single layer. But a t-shirt is 2 layers and the other side won’t have as much color. So it depends on the look you’re going for.

· Lay it out flat on your work surface then bunch it up. Try not to get parts folded under when bunching it up. You want to create high and low spots but not more layers. How tightly packed it is will affect how much dye gets into the fabric and to the back since the dye is applied to the tops of the ‘hills’ and won’t run down to the ‘valleys’ easily if it is tightly packed. 


 · I normally put the shirt into a one gallon bucket to keep it compact and to make it easy to handle. But for larger shirts I’ve used a plastic tray or plastic sheeting in a cardboard box.  A larger plastic tray can hold more than one shirt or scarf at a time.  5 quart ice cream buckets would work well and have the added bonus of 'requiring' someone to eat the ice cream.


· Put the items in the freezer. If they’re only in there an hour or two they’ll have a different end pattern than if they’re in there for at least a day and are frozen solid. Since I’m in Minnesota I could put them out in the garage come January. See here for a comparison

· For the dye, I mix it fairly strong since I want it to be a good contrast to the white of the fabric. Again, it depends on how you want it to look. I use two or three colors. They may intermix so choose colors that will blend nicely. I mix at one tablespoon dye powder to one quart water and can cover 4-6 shirts with this amount. Make sure to wear your dust mask and gloves when working with dye powder. Wet some newspaper and lay it on the table before mixing the powder. It will help capture powder and make it easily visible and cleanable. I don’t add urea or anything else. Only dye powder and warm water. If you want more info and hints on how to mix up the dye powder, Dharma Trading has good detail.

· You can put the dye liquid into squirt bottles or measuring cups with spouts. Once you’ve used a cup or spoon for dye don't use it for food again. Use some cheapo or disposable cups and spoons. Check out Goodwill or the dollar store.

· Apply the colors in patches. You’ll have to experiment to see what you like best. I tend to cover the surface with dye. Usually, I use 2 colors in about equal amounts then add a third color in a smaller amount.


· Let sit for at least one day for it to thaw and react completely. The dye won’t react with the fabric until it gets up to room temp. If the area you’re storing the container in is colder, you’ll want to leave it for a couple days. It won’t hurt it any to leave it for several days until you’re ready to wash it out. The top might dry out a bit, but it won't hurt it if it does. And after a couple days it doesn’t really matter since all the dye that was going to react already has.

· Rinse well in cold water then wash by itself in warm or hot until the water is clear. Once the extra dye is thoroughly washed out it can be washed normally.

· Enjoy.

Thursday, December 8, 2011

Wine

Another scarf where the dye didn't move the way I expected.  Although this one was wetter than normal since the dye wasn't wicking across the scarf the way I wanted so I misted it with a bit more water. 

The edge isn't blurry because of the photo, that is the way the pattern worked out.  It really gives it nice visual texture with the contrast of the sharpness and the diffuseness. 

It looks like a nice wine, to go with the chocolate one I posted yesterday.


Wednesday, December 7, 2011

Chocolate

I really like the pattern that resulted on this silk scarf.  I stretched it on the frame, painted on the dye and sprinkled rock salt all over.  Salt attracts moisture and so the color can move along with the water it is dissolved in.  The more dye collected in one spot, the darker it is.  But different colors of dye react in a variety of ways.  Blue moves a lot more than red, for example. 

It also makes a difference how wet the scarf is or how large the salt crystals are.  If the salt just dissolves then it won't pull the dye around.

The chocolate brown dye I used for this one didn't move in the same way as the blue one in the post here.  It did give a really neat texture though.  Kind of like miniature leopard spots.  It looks like it should have a pebbly texture, but doesn't. 

See, chemistry matters.  And is fun.


Thursday, June 16, 2011

Folds

It’s a good thing plain white fabric is reasonably priced so I can do practice pieces. The marking pencil didn’t come out from some areas when I decided I didn’t like what I’d drawn the first time. And the shape isn’t quite what I wanted. And…. But that’s what practice pieces are for.


For this one, I used dye thickened with sodium alginate because I didn’t want it spreading too much. But I need to put dye further from the stitch line so it shows up better.


The PVC cup was to try to keep the dye from getting on the part I wanted to stay white. I was concerned that it might get transferred to the other half by my hands or dye on the table. There is a technique called oke zome where the stitched fabric is placed in a bucket and a tight lid is place on so the fabric can be dunked in the dye vat. Indigo requires the item to be dunked in the dye vat several times to get a dark blue color. Since the indigo turns blue when exposed to the oxygen in the air, it doesn’t work well being painted on.

The little red pieces are bits of fabric I put between the knots and the fabric. It keeps the knots from showing up on the piece and makes it easier to find your knots when it’s time to take out the stitching.


I like how the finished piece turned out. I'll try again to get closer to what I have in mind.

Wednesday, April 20, 2011

Black


This used to be black. It was stitched then bleached. You can't see the design very well. But it is interesting that it turned kind of orangeish, rather than gray.

Tuesday, June 15, 2010


Above is a picture of a brown and green shirt I have in my Etsy store. It was done with the Mokume Shibori technique. It shows the different pattern depending on if the rows of stitching are offset from each other.

The brown rows were carefully stitched the same for several rows. This made the fabric pleat in a consistent way. At the edge of the brown I stitched exactly the reverse, to give change the pattern. Then I left about 2" and stitched the green area in a more random, alternating way.

So when you look at the pattern you can see where the stitches line up more, row after row, and where they alternate a lot more. Both patterns are nice. It gives a nice texture.

I suppose if I was really careful I could get something similar to a checkerboard. But I would also have to spend an awful lot of time getting the fabric to pucker right when I was pulling up the threads. You have to kind of work it a bit to get it to go nicely. And you don't want the sewing threads to sit on top of the fabric, it leaves little dashes. Some are good, but too many give a look that isn't what I'm trying for. Kind of like weeds are plants where you don't want them. They may be pretty, but only if they are where you want them.

Monday, June 7, 2010

Like tightening a corset or something


Today's picture is of the shirt I was sewing up. I have almost all of the threads pulled up tight. Once I get them all pulled and tied off it'll be ready for dyeing. Then it'll look a lot like the orange one in my first post. You can see the ripples and folds the sewing makes. You don't want the rows too consistent or you'll get something more like pleats. Depending on how far apart the rows are, how far between stitches, if you go straight or wavy, etc., change the result.

Shibori was frequently dyed using indigo. While it take a bit of work to get a vat going, it doesn't need a mordant like most other natural dyes. The problem with most natural dyes is that the mordant can be quite toxic. A mordant is something that makes the dye react with the fiber and permanently bond to it. Think of bread. Without water, the yeast won't 'eat' the flour and create carbon dioxide and cause you bread to rise.

And an indigo vat can be like sourdough starter. It takes some care and feeding to get it set up and maintain it. But then it isn't so bad. But my setup doesn't work well to use an indigo vat. Also, I like to use a lot of different colors. Although I do prefer a nice blue that is close to indigo blue.